Easter is one of those times of the year when we tend to pull out the stops and make special things to share and enjoy with family and friends.
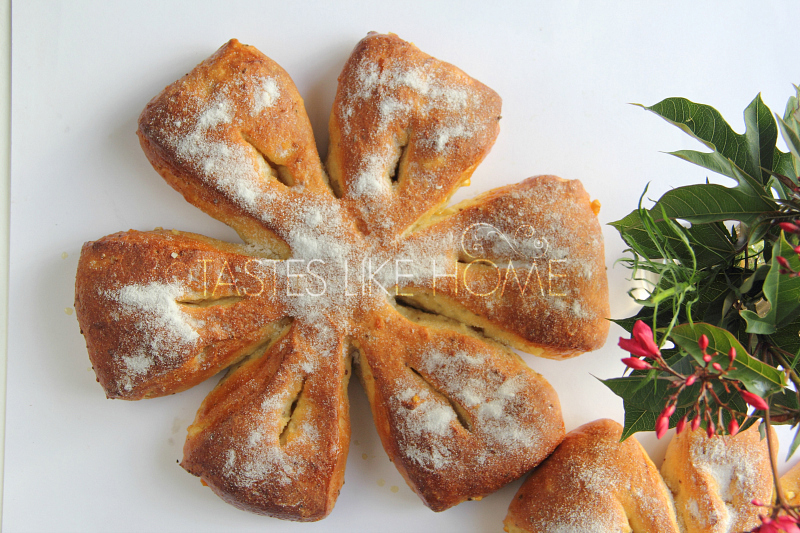
![]() I promise, this Citrus Anise Bread will have everyone wanting an extra piece. Sweet, dotted, and aromatic with anise, and brightened with the flavour of citrus, this is a bread to be shared. This is the kind of bread to break with loved ones. If you like to dunk, a dip into a cup of tea or coffee will make your mouth happy!
I promise, this Citrus Anise Bread will have everyone wanting an extra piece. Sweet, dotted, and aromatic with anise, and brightened with the flavour of citrus, this is a bread to be shared. This is the kind of bread to break with loved ones. If you like to dunk, a dip into a cup of tea or coffee will make your mouth happy!
Serve it for break, brunch or afternoon tea.
Happy Easter Everyone!
Sweet Citrus Anise Bread
Yield: 2 loaves
SPECIAL EQUIPMENT
2 (13” x 18”) sheet pans lined with parchment paper
INGREDIENTS
For dough:
3 ½ cups all-purpose flour, plus extra for work surface
1/3 cup white granulated sugar
½ teaspoon table salt (fine salt)
2 teaspoons instant yeast
½ cup water
½ cup whole milk
1 heaped tablespoon anise (seed)
¼ cup or 2 oz. unsalted butter or shortening
2 eggs, room temperature, lightly beaten
¼ cup citrus peel
For glaze:
½ cup orange juice
½ cup white sugar
3 tablespoons caster sugar (use regular white granulated sugar if you do not have caster sugar)
DIRECTIONS
- Mix together in a large bowl: the flour, sugar, salt and yeast and set aside.
- Add the water, milk, anise, and butter to a small saucepot, stir and heat on low to 115 degrees F. If the temperature is reached and the butter is not completely melted, heat it to 120 degrees F then remove the saucepot from the heat and let it cool to 115 degrees F.
- Make a well in the centre of the flour and pour in the eggs followed by the water-milk-spice-butter mixture and mix to form a soft dough. Dust a work surface with flour, transfer the dough and knead for 2 minutes then press the dough flat, sprinkle with citrus peel, fold dough in half, sprinkle with more citrus peel, fold in half again and sprinkle with remaining citrus peel. Continue to knead dough for 5 minutes to develop the gluten and incorporate the citrus peel. You may need to lightly dust the work surface as you knead the dough.
- Transfer the dough to a large oiled bowl, cover with plastic wrap or a cloth kitchen towel and let rise until more than doubled in size – about 1 ½ to 2 hours depending on your location and temperature.
- Punch down risen dough, divide in half and form each piece of dough into a ball. Cover the dough and let it relax for 10 minutes.
- Shape the dough to your preference – plait, round or oblong or roll each piece of dough into a log 16 – 18 inches in length and then roll into a tight spiral. Transfer dough to oiled pans, cover and let rise until more than doubled in size about 45 minutes to 1 hour. OR, to make the snowflake design, follow the instructions below in the notes section.
- While the shaped dough is rising, make the glaze by combining the sugar and water over medium heat. Stir to dissolve the sugar and bring to a boil; boil for 2 minutes then remove from heat and set aside to cool completely.
- 20 minutes before the 1-hour rising is up, preheat oven to 350 degrees F. Transfer pans to the to oven and bake for 25 – 30 minutes or until the loaves are browned and sound hollow when tapped. Halfway during the cooking process, switch the pans so that the loaves cook and brown evenly. Or you can choose to bake one loaf at a time.
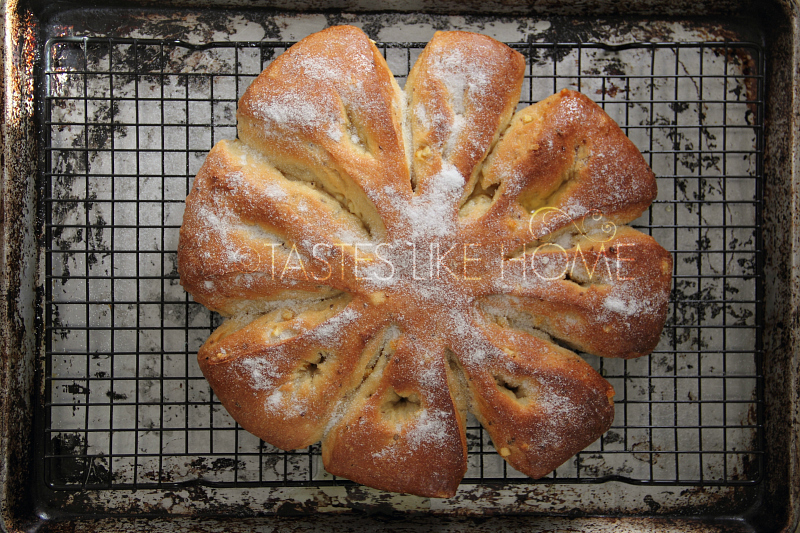
- As soon as the loaves come out of the oven, brush them generously with the orange syrup and then sprinkle all over with the caster sugar.
- Let cool in pans for 10 minutes and then transfer to wire racks to cool completely.
- Serve warm or at room temperature. Do not cut, let persons tear or pull apart the bread.
NOTES – SNOW FLAKE SHAPING
To cut the dough, use a straight rigid piece of metal or plastic. A dough scraper would work perfectly for the large cuts. For the smaller cuts use the edge of something like a square-end spatula or something that will cut small in a similar manner.
When cutting, it is important to cut guillotine-style – firm and straight down. Do not drag the blade through the dough, as this will prevent the edges from rising properly and spoil the shape.
It is highly recommended that you shape and cut the dough directly on the parchment sheet upon which the loaf will be baked; this will make for easy transfer to the baking pan.
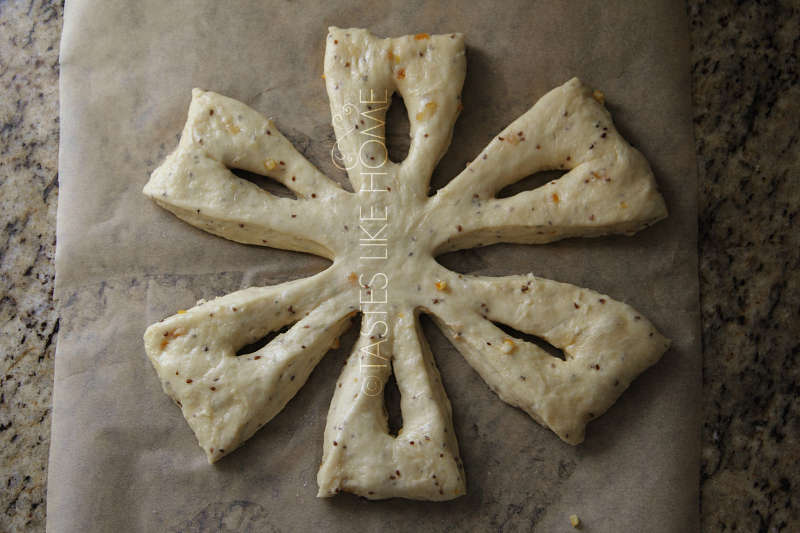
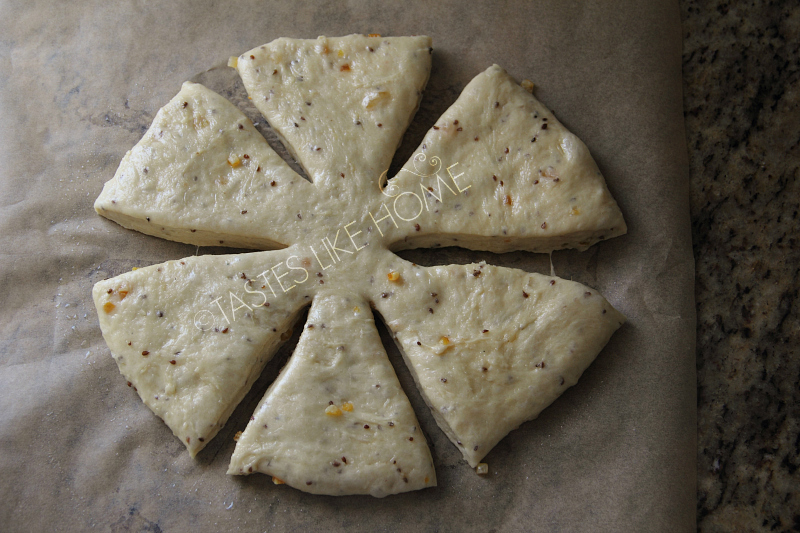
- Take the rested dough ball and flatten it seam-side down into a disk of about ¾-inch thickness. Cut the disk into 6 sections leaving them connected at the centre. (I cut one ball into 6 sections and the other into 8 as matter of personal preference). Pull the sections outward to separate and elongate them a little. Make a cut through the centre of each section; do not cut all the way through to the edge.
- Use your fingers to open the cuts and push the edges of the sections a bit inward.
- Transfer to dough along with the parchment paper to the baking sheet and continue with recipe from direction # 7.