 Hi Everyone,
I am not a daily bread eater but when it comes to feasts, festivals, and holidays, count me in for celebration bread!
Celebration bread is enriched bread that’s made with ingredients such as milk, butter, eggs, spices, fruits, nuts, citrus zest and sometimes herbs. It is called celebration bread because these types of breads are usually made on special occasions, such as Easter that was celebrated last weekend. In my last column, Cross Buns 2.0 (by the way, those are considered celebration bread) I explained how each year I am always tweaking my Cross Buns recipe, well, each year at Easter, I am always making a different type of celebration or traditional Easter Bread from around the world. This year, using Challah as a base, I adjusted the quantity of ingredients and added cinnamon and raisins to make raisin loaves.
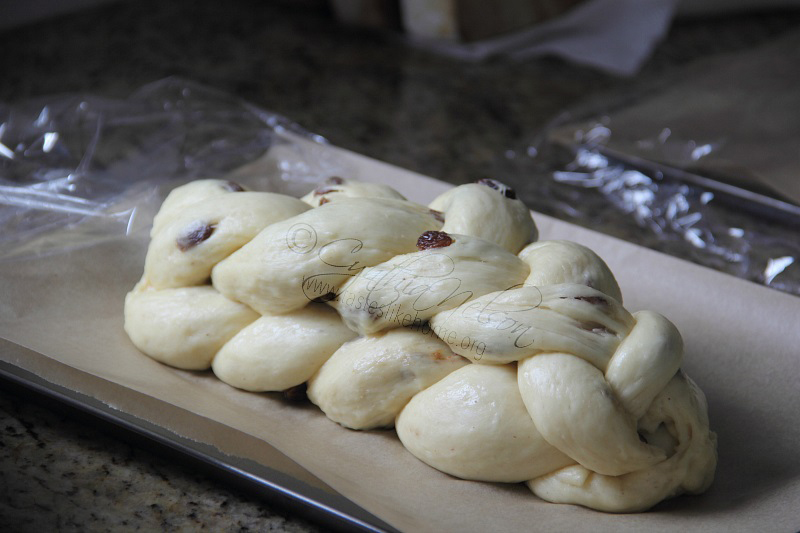
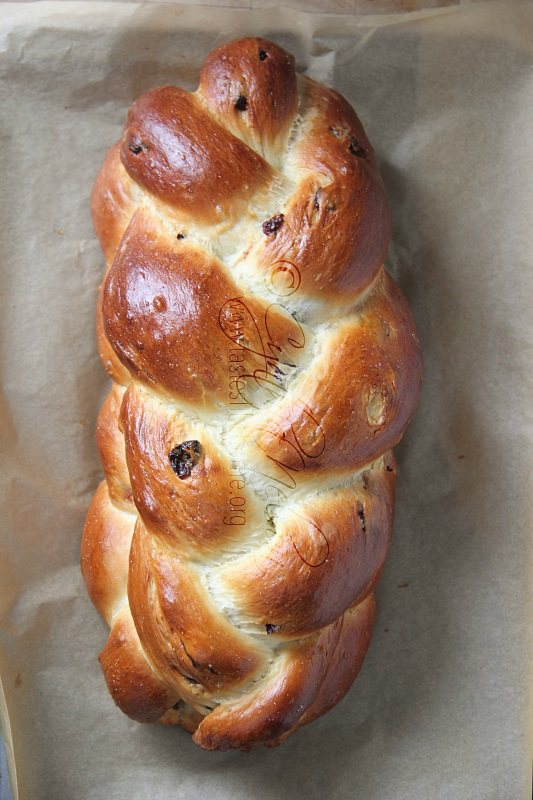
Challah (sometimes called egg bread) is a special bread in Jewish cuisine; it is a traditional Sabbath bread and it’s typically eaten on Jewish holidays too. Rich with eggs and sweetened with honey or sugar, it is the perfect base for a celebration bread. I made raisin loaves, but the recipe can be adapted to take on different flavours by using other spices such as cardamom or aniseed, dried fruits like cranberries or apricots and herbs such as rosemary or thyme. Of course, you can add finely chopped nuts too. With Challah’s signature look from braiding the dough and the high-gloss finish from the egg wash, this bread is a stunner.
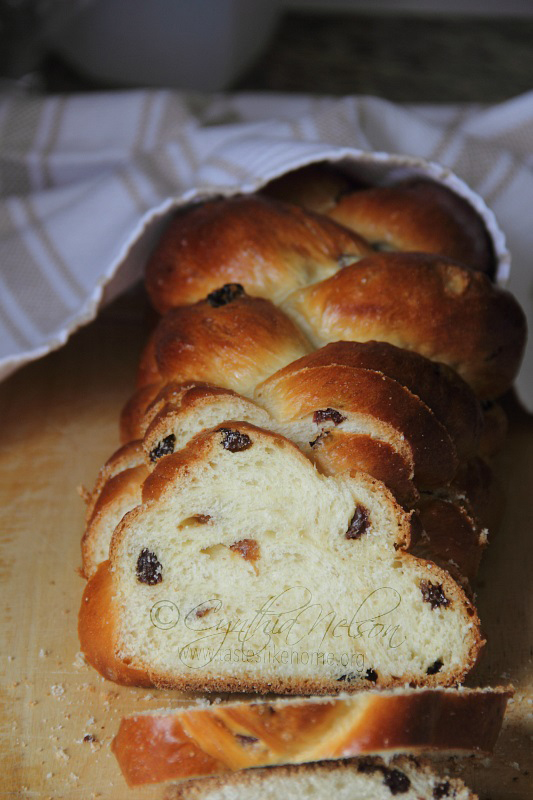
As with all breads, celebration breads are excellent on the same day they are made – cut into thick slices and served while still a little warm, with butter, jam or jelly. However, the following day, toasting the bread, scraping butter across the crust, and downing it with a cup of tea, coffee or cocoa, is one of life’s little pleasures. Leftovers can be turned into French toast or bread pudding.
We are still in the season of celebration, so let’s share bread.
Celebration Bread (Raisin Loaf)
Yield: 1 large loaf or 2 regular loaves
INGREDIENTS
● 4 ½ cups all-purpose flour, plus extra for the work
surface
● 1/3 cup white granulated sugar
● 1 teaspoon fine table salt
● 2 teaspoons dry instant yeast
● ¾ teaspoon ground cinnamon
● 1/4 cup vegetable/canola oil or melted butter (unsalted)
● 3 eggs room temperature, plus 1 yolk (reserve the white for the egg wash)
● 1 cup warm whole milk or water (110 – 115 degrees F)
● 1 heaped cup raisins, room temperature
DIRECTIONS
1. Mix together 4 cups of flour, sugar, salt, yeast and cinnamon in a large bowl. Make
a well in the centre and set aside.
2. Mix together the oil and eggs and set aside.
3. Pour the milk into the centre of the flour and using
a fork, mix in a little of the flour
to make slurry (this is to cool down the milk a little
before adding the eggs).
4. Whisk the egg-oil mixture again and pour it into
the centre of the flour mixture
and mix everything together, the dough will be
shaggy.
5. Flour the work surface with the remaining ½ cup
flour and turn the dough on to
the work surface. Sprinkle extra flour over the
dough and flour your hands well.
Knead the dough for 8 minutes, adding a little flour at a time as need. Sprinkle in
the raisins after the 8 minutes of kneading – spread the dough out creating a flat
surface, liberally sprinkle with raisins; fold one corner of the dough on to itself and
sprinkle with raisins, fold the dough onto itself again and sprinkle with the
remaining raisins. Now continue kneading the dough for 2 – 3 minutes until the
raisins are incorporated. Don’t worry if a few raisins fall away; simply tuck them into
the dough. Transfer to a large oiled bowl. Rub the dough with oil, cover and put the
bowl somewhere warm and draft free. Let rise for 1½ to 2 hours our until the
dough is more than doubled in volume.
6. Line a 13 x 18-inch sheet pan with parchment and set aside or line 2 (9 x 13-inch
sheet pans).
7. Turn the dough on to the work surface and press all over to deflate it, releasing the
air/gas.
8. Now you have some options here depending on how you want to braid the bread
– If making 1 loaf, divide the dough into 3 equal pieces; if you are making 1 loaf with
a double bread where 1 braid is mounted on top of the other, then divide the
dough into 2 pieces making one piece larger than the other, for example 1 piece
2/3 and the other piece 1/3. Now further divide each piece into 3 equal pieces to
make the braids. You should have 6 pieces of dough. On the other hand, if you
would like to make 2 separate loaves, divide the dough into 2 equal pieces and
then cut each piece into 3 equal pieces to make the dough.
9. Roll each piece of dough into logs to make the braids. If at first roll, the dough is
springing back, let it rest for a few minutes for the gluten to relax and then roll it
again.
10. Braid the dough and transfer to the baking sheet/s. (See note below if making a
double braid). Cover loosely with plastic wrap and let rise somewhere warm for 45
minutes to 1 hour depending on your location and warmth of the atmosphere.
11. Twenty minutes before the rising time is over, preheat the oven to 350 degrees F.
12. Whisk together the egg white with 1 tablespoon water.
13. Brush the dough with the egg wash just before transferring to the oven. Bake for
30 to 35 minutes, rotating the pan halfway through cooking to brown evenly. The
bread is done with it is deeply browned.
14. Remove bread from pan and cool on wire rack. Let cool to barely warm or room
temperature before slicing. (If you have baked in loaf pans, let breads rest for 5 –
7 minutes before removing from pans).
NOTES
● If making a double braid, place the larger braid on the pan first and brush the
center with egg wash then add the smaller braid on top, pressing it gently to bind.
● If you are making 2 separate loaves, in addition to rotating the sides of the pans,
rotate the pans also from one shelf to the other for even cooking.
Cynthia