 Last week, we addressed the motions of castling on the Kingside and Queenside. Castling is a strange move, but not a complicated one. As mentioned last week, you cannot castle when you confront certain situations. This week, I will illustrate those situations through diagrams to give the chess beginner a better understanding of castling.
 Castling Diagram 1
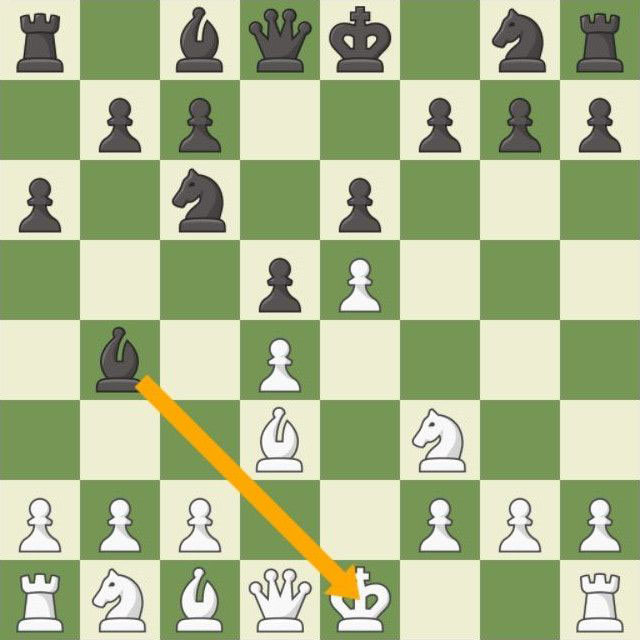
In Diagram 1, White is in check with the black Bishop. In this position, White can either block with his pawn, his Bishop, his Knight, or his Queen. He can also move his King to a White square. If he moves the King, he loses the right to castle. So, the most intelligent thing to do in this position is to block. Remember, it would be foolish to block with the Queen because the Queen is worth 10 pawns and the Bishop is worth 3 pawns.
 Castling Diagram 2
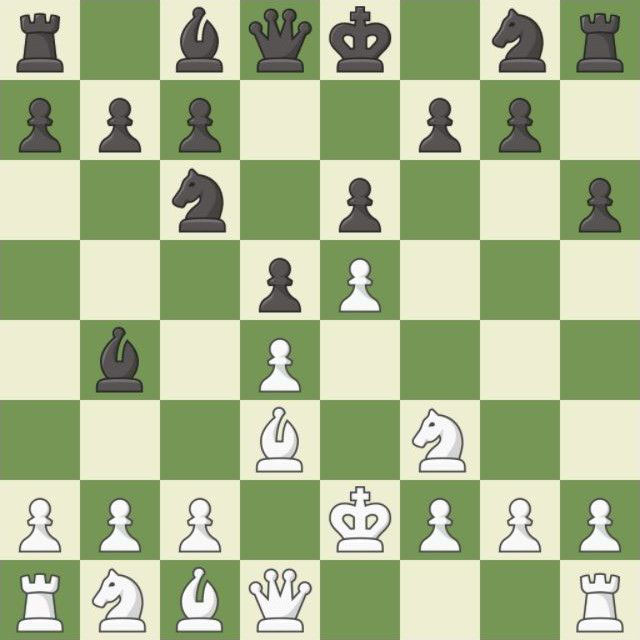
In Diagram 2, the King has moved to evade the check. The problem with this move is that the King would not be allowed to castle. It was better to block the check.
 Castling Diagram 3
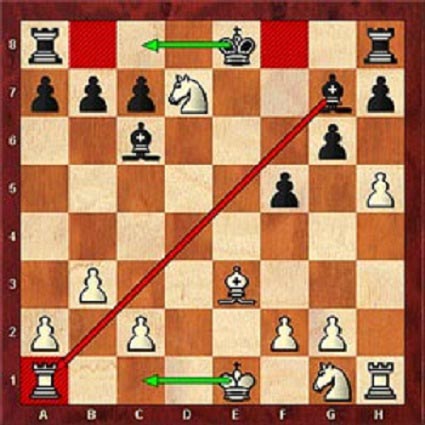
In Diagram 3, White is unable to castle. White cannot castle when an opposing piece moves through or ends up on a square that is being attacked by an enemy piece. In this position the King cannot cross the line of the enemy Bishop.
 Castling Diagram 4
Diagram 4 demonstrates how White can castle on the Queenside although Black’s Bishop is attacking the Rook. Remember, only the King is prohibited from crossing the line of fire, not the Rook. The way is cleared for the King to castle on the Queenside. However, the black King cannot castle on the Kingside because it would have to cross the f8-square controlled by the White Knight. But Black can castle Queenside if the player so chooses. The Rook can cross the b8-square which completes the castling move.