Hi Everyone,
As I told you last week, my mother is visiting and, over the period of time that she’s been here, there have been several requests for specific things that she would like to eat and drink. Milk bread is one of those requests.
 Before I acquiesced to her wish, I enquired about her desire to have milk bread. Her response was straightforward, “You can eat it just like that without anything. It tastes better and I like the texture.”
“Tastes better?” I enquired. “Better than what?”
Who told me to ask… mommy launched into a rant about the different bakeries in Guyana and “the ‘things’ some of them making that they call bread.” She described bread from a bakery that when cut the slices crumble. She scoffed at bread from another well-known bakery that she says was nothing to talk about. All is not lost though, there are two bakeries from which she would buy bread and tennis rolls. Neither of the bakeries she patronizes makes milk bread but one of Guyana’s larger well-known companies does; mommy likes the milk loaf. According to my mother, “It is a good loaf of bread.”
I’ve made many types of loaves and breads including regular loaves where I have simply replaced water with whole milk. The result of replacing water as the liquid with milk yields a softer, fluffier bread that tastes better, with a slightly longer shelf life (at room temperature). I figured that was the milk bread mommy was after. However, I also know of another type of milk bread that is sold in Asian bakeries. Depending on where you find it, the bread is labelled as Japanese Milk Bread or Hokkaido Bread. The traditional Hokkaido bread requires a starter known as tangzhong. Tangzhong is a cooked water and flour paste used in Asian bakeries to make breads and buns with a soft, springy texture. Obviously, other ingredients are added to the starter (tangzhong) to make the bread and rolls.

I had never tried making Hokkaido bread before mainly for two reasons – while I have the patience to make things that take a lot of time and effort, somehow that does not translate to breads that require a starter. Secondly, the dough for Hokkaido is very sticky and difficult (though possible with a lot of patience) to knead by hand. It is so tacky that your instinct would be to keep adding flour so that you could handle the dough, and that my friends would be imprudent; you’d end up with bread void of any of the qualities for which Hokkaido bread is known. If there was a time you wish you had a stand mixer, it would be for this bread. I do not have a stand mixer (by choice). However, I do have a powerful hand mixer that comes with dough hooks.
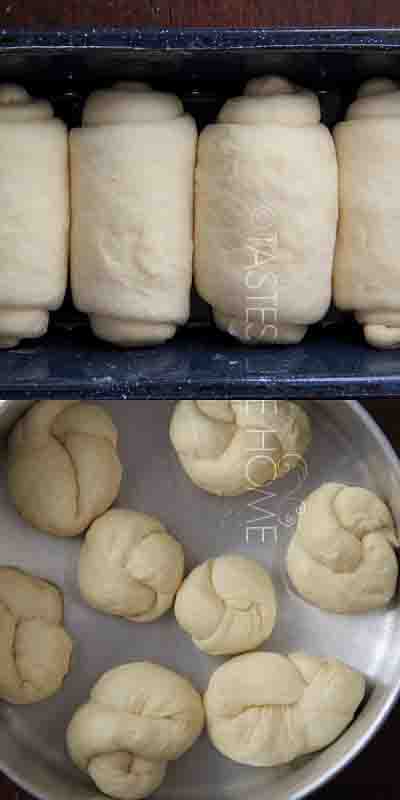
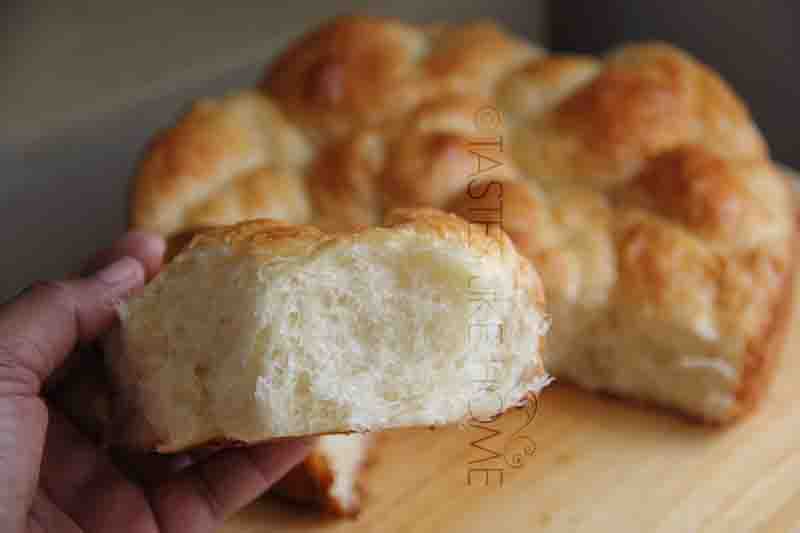
Making the bread was relatively easy. The hardest part was working quickly with the dough to shape the bread and rolls so that it didn’t become too tacky. The dough when risen and ready for the oven was powerfully puffy and sprung a little more in the oven. Attractively brown and glistening from the egg wash, the proof was going to be in the eating. I was a little apprehensive because I knew that this was not the milk bread my mother would have been thinking of when she made her request.
For dinner she requested 2 slices of the bread with butter. I placed the plate in front of her on the table and quickly disappeared into another room. I had already made up my mind that the following day I was going to make the other kind of milk bread where I would simply replace the water with milk. I know what it is like to have something in mind that you really want to eat only to be disappointed by what you end up having. Mommy called out to ask for another slice of the bread and I almost fainted with relief! “You like it?” I asked.
She smiled and said, “Yeah man. This is really nice bread and you don’t really need to eat it with anything.”
Encouraged, I explained that the dough has an egg and a combination of evaporated and regular whole milk, as well as butter, all of which make it richer. Even the crust was given special treatment – the gloss is from the egg wash.
The following morning, instead of her usual banana and coffee, mommy requested 2 slices of the milk bread with cheese (which she ate separately). I figured that that was a nice cooking note on which to end mommy’s visit because not everything I made was greeted or eaten with such enthusiasm. (Laugh).
Happy 50th Guyana!
Milk Bread
Yield: 16 rolls or 2 (9 x 5) loaves
Please read the cooking notes below before attempting this recipe.
INGREDIENTS
For dough:
- 4 cups all-purpose flour
- 1/3 cup white sugar
- 1 tablespoon instant yeast
- 1½ teaspoons fine (table salt)
- 2/3 cup warm whole evaporated milk (110 degrees F)
- 1 cup warm whole milk (110 degrees F)
- 1 whole egg, room temperature, lightly beaten
- ¼ cup softened butter (salted or unsalted)
For glaze:
- 1 whole egg, room temperature
- 1 tablespoon tap water
DIRECTIONS
For dough:
- Mix together the flour, sugar, yeast and salt and transfer to a large bowl or bowl of mixer fitted with dough hook.
- Pour the milk(s) and egg into the flour mixture and mix together for 5 minutes (scrape down the sides of the bowl if necessary).
- Add the butter and mix for 10 minutes or until the butter is incorporated into the dough and dough becomes one smooth mass (it may stick a little to the bowl but come away easily when pulled).
- Transfer the dough to a large well oiled bowl. Cover and let rise for 45 minutes to an hour or until doubled in size.
- Punch down dough to deflate and remove the air bubbles. Divide dough in half if making loaves or in 16 pieces if making rolls. OR Divide in half and then further divide one half into 8 equal pieces. Roll all pieces of dough into balls. Cover and rest for 10 minutes.
- Shape balls based on your preference and transfer to well-greased pans, cover and let rise for 45 minutes to 1 hour. Twenty minutes before the second rise is up, preheat the oven to 350 degrees F.
- For glaze – whisk together egg and water and brush over loaves/rolls before transferring to the oven.
- Bake for 25 minutes or until brown and glistening.
- Remove pans from oven and let rest for 10 minutes before transferring to wire racks to cool completely.
NOTES
- This dough is not easy to work with by hand in the kneading process, however, if you have a sturdy hand mixer that comes with dough hooks, you can use it but let the mixer cool down after every 5 minutes for a minute or two. To assist the mixer, keep turning bowl as you work and work from the edges of the dough inwards. Also try lifting the mixer up and down, back and forth as your mix the dough.
- If using a hand mixer, mix the dough for an additional 3 minutes at direction # 3.
- It is very important that the ingredients such as the milk(s) be at room temperature or warmer so that they can activate the yeast. These are dairy items usually stored in a refrigerator hence the need to emphasize the temperature.
- Active dry yeast can be used in place of instant; proof with some of the warm whole milk for 10 minutes before adding to the other ingredients.
- Salted butter has varying degrees of saltiness depending on the brand so be mindful of getting an overly salty butter.
Cynthia
cynthia@tasteslikehome.org
www.tasteslikehome.org