 Hi Everyone,
What’s Cooking is a series in which I answer questions you may have about food or cooking but are too shy to ask.
There are many types of bakes (fried and baked). A wide variety of these puffed, brown, dough discs can be found all over the region with different names depending on location. Each type of bake distinguishes itself by size, shape, thickness and taste. What they all have in common are the main ingredients – flour, water, and a leavening agent. The addition of butter, shortening, ground spices, salt, and sugar are optional add-ins that each cook uses to make their signature bake.
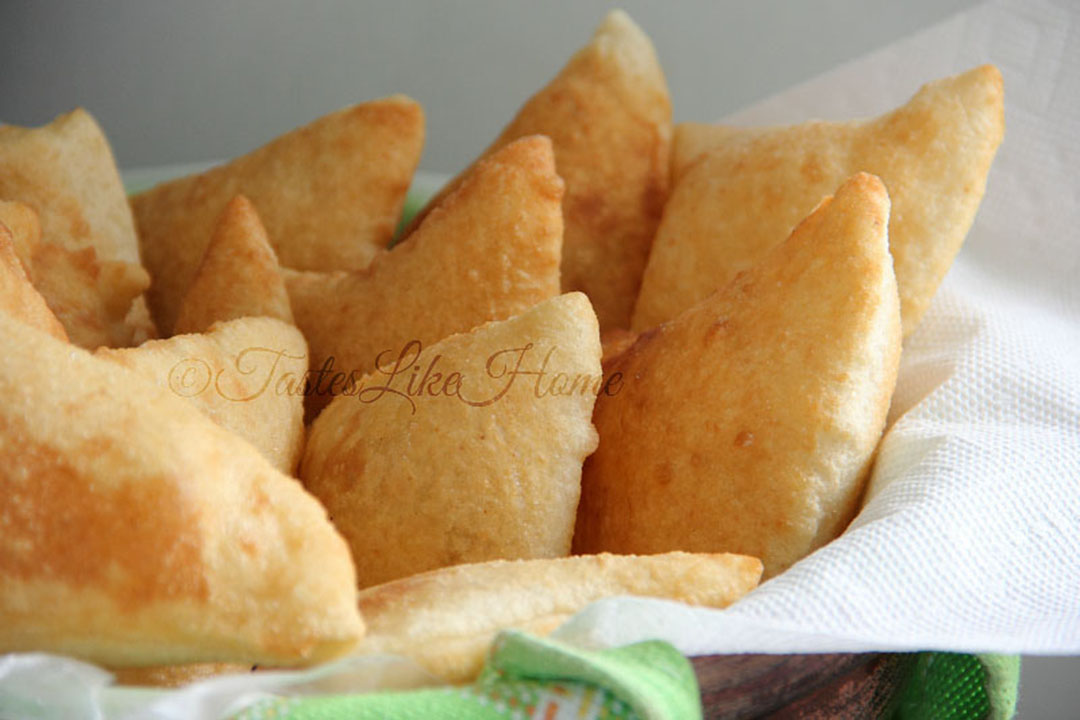
Today’s focus is going to be on the style of bakes that is called floats, float bakes, Indian bakes or Guyanese Bakes (well, at least one type of Guyanese bakes). These are the types of bakes that puff up and literally float on top of the oil as they cook. The question many people have asked, is, how to get their bakes to puff up and swell when cooking.
There are several key areas to pay attention to and I will discuss them in the order of making the bakes from dough to frying.
Flour and leavening
Regular all-purpose (AP) flour gives one of the best results to the making of float bakes. While you can replace some of the AP flour with other types of flours and ingredients such as grated cassava, mashed ripe breadfruit or mashed sweet potatoes, the results in terms of texture will vary somewhat, and of course the flavour profile of the bake would be altered. Depending on the other types of flour you use, you may find that the cooking of the bakes take longer and more oil is absorbed due to the structure of the combined, complex dough.
Leavening
It is not necessary to use baking powder and yeast to make float bakes. Most people use a combination of both because they believe that the yeast will help the bakes to rise when they are being cooked. Baking powder is all you really need; however, using the right quantity of baking powder to flour is key to ensuring that the bakes swell. Use 1 level teaspoon of baking powder to each level cup of all-purpose flour.
Kneading and resting
Bring together the dough by mixing the flour with enough water to make a soft dough. It should not be a hard dough or a sticky dough; it is the type of dough that you can knead easily and gently in a bowl or work surface with light dustings of flour. Once the dough comes together, it should be kneaded long enough for the strands of gluten to develop so that it can begin its work of becoming pliable enough to be stretched, rolled and eventually swell when heated. Now here’s the thing, the longer dough is kneaded, the tighter and firmer would be the end result of whatever you are making.
The shorter kneading time will yield softness and tenderness. Always be guided by the kneading time recommended in a recipe as it is important to the end result. However, we must leave room for signature bakes and people’s personal preferences. For example, my food-in buddy Al Fernandes likes a firm structure to his bakes and paratha roti and therefore kneads his dough longer than I would knead mine.
For tender bakes, I recommend you knead the dough for no more than 4 minutes once the dough comes together. Rub a little oil all over the dough and the inside of the bowl, cover it and let it rest. Rubbing the dough with oil is to prevent it from forming a dry skin and covering it keeps the dough from drying out.
Resting
You do not want to ruin the foundation set by the kneading process by not allowing the dough to rest for an adequate amount of time.
If the kneading stage was to develop the gluten in the flour, think of the resting period as the toning of the gluten. As the dough relaxes, the gluten elongates and smooths itself out. It is getting itself ready to be cut, rolled, stretch and expand when activated by heat. When you lift the cover of the bowl you will see the value of letting the dough rest as it will be smooth and might have spread or grown a little. Do not skimp on the resting time for the dough. Let the dough rest for at least 30 minutes (½ hour). The dough can rest for much as 90 minutes to 2 hours.
Cutting and rolling
Cut/divide the dough into equal pieces and roll them into balls and let them rest for a few minutes. This is another situation where personal preference comes into play. Some people, like myself, make individual bakes with each small round ball of dough while there are others who cut the dough into large pieces, roll out the dough and then cut it into pieces making multiple bakes. Either way is fine.
Tip: If you are going to do the latter – big piece of dough rolled and then cut into smaller pieces, when cutting, do not drag the knife across the dough, cut straight down, firmly, quickly, guillotine style. Dragging the knife across the dough will cause the cut edges to twist and seal in a way that might prevent the bakes from puffing up when cooking or burst at the seam as they swell and take in oil.
Tip: If the bakes are merely to work as shells in which to stuff things such as salt fish etc, roll the dough thinly. However, if you want bakes that are a little meaty on the inside with nooks and crannies in which butter would melt and meander, then roll the dough about ¼-inch or just shy of. These bakes can be stuffed too.
Oil and heat
Float bakes require deep-frying; there is no way of getting around it. In order for the bakes to float, there must be enough substance for them to float on. For these type of bakes a karahi or wok-style pan is really perfect. Because of the rounded, kind of pointed bottom you actually use less oil for the deep-frying process. With other flat-bottomed pots and pans, you need to use more oil so that there is enough room for the dough to sink momentarily when added to the hot oil and then rise and float to the top.
Medium heat is good for frying bakes. If you use one of those electric stoves with numbers, I’d say work somewhere between 7 and 8. One of the important things to frying (anything) is to ensure that the oil is properly heated before adding the food to cook. To make the float bakes, add enough oil for deep drying (the amount would vary depending on the size and type of pan/pot being used). When making float bakes I use a 9 ½-inch round karahi and when I add oil, it comes up about 2 ½-inches in the pan.
To determine if the oil is heated enough to cook the bakes, I go around to the side of the stove to look at the surface of the oil in the pan, if the oil is shimmering and there are little round ripples such as you would see when rain falls lightly on water, I know that the oil is ready. You can, of course, use a thermometer and if it registers 325 degrees F it is ready. Or another way is to test the oil by frying a piece of dough before cooking the bakes.
I cannot stress enough that all your hard work will be lost if the raw dough is added to oil that is not adequately heated. The dough would sink, staying too long at the bottom of the oil waiting for the heat to propel it upwards all the while absorbing unnecessary grease. When it eventually gets to the top, there would not be enough heat to cause the dough to swell and cook quickly. Therefore, ensure that the oil is properly heated. Here is what is supposed to happen.
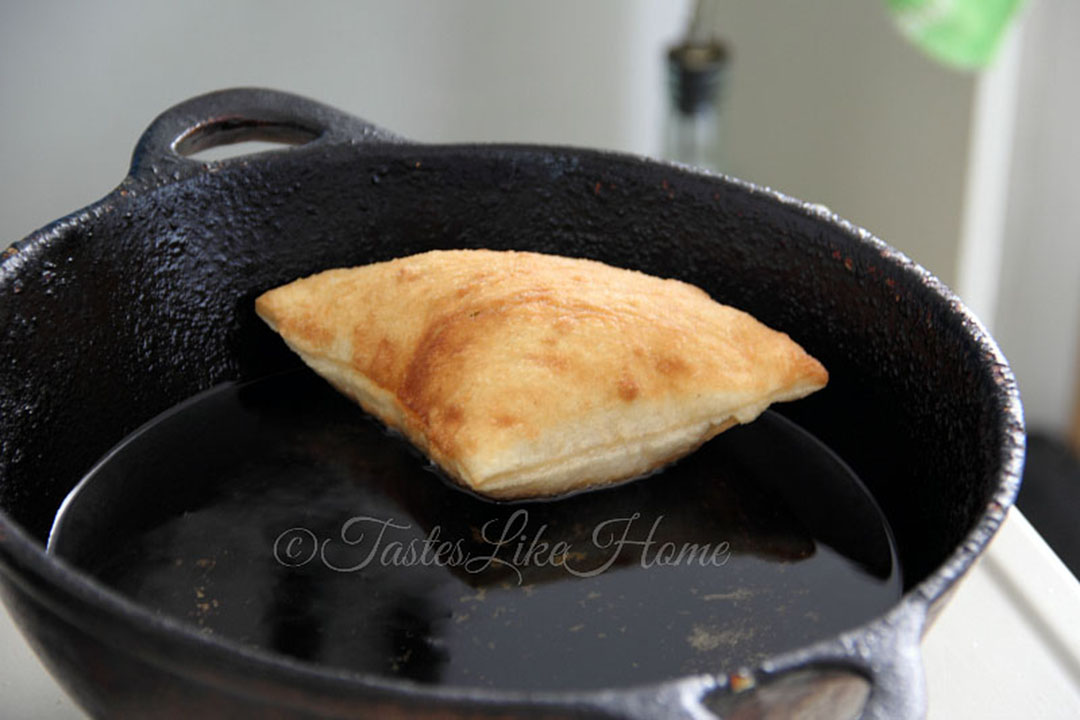
When you lay the rolled piece of the dough into the pan/pot of heated oil, it should sink to the bottom and within 4 – 6 seconds it should start to rise to the surface and swell. If it doesn’t the oil is not hot enough. Do not automatically raise the heat to high as this might result in the bakes browning on the outside and being raw on the inside.
Tip: To aid in the bake puffing up when it reaches the surface, spoon some of the hot oil on top of the bake.
Let the bake cook for a minute or until golden brown, flip and brown/cook the other side. Fry one bake at a time but if you are working with a large pot/pan with a wide breath then you can cook 2 or 3 bakes at a time. There must be enough room in the pan for the bake to sink, rise, and bubble to the surface, swell, and then float around.
With all this talk about bakes I am yearning for a couple, warm, with a cup of cocoa.
Cynthia
Cynthia@tasteslikehome.org
www.tasteslikehome.org