 Like many of you, I too have been baking since the Covid-19 lockdown. Okay, perhaps I should say that I have been baking more than normal, with my friends and neighbours being the beneficiaries.
Do you have a list, or perhaps lists of things that you’ve been meaning to make or try making? I do. I have lists (laugh) but never the time. However, amidst facilitating online classes and grading assignments, I find myself making the time to bake. It breaks up my daily routine and focuses my attention in a way that few other things can. Baking demands your attention because of the precision in terms of weight and temperature of ingredients, methods preparation, oven temperature control and cook time and resting or cooling time when baking is complete. For many I know that it can be nerve racking, however, I find baking to be relaxing and rewarding.
You may have heard me say this before, I am not a big bread eater and by that I simply mean that it is something that I do not eat regularly, only when my mind calls for it and that is not often. However, making bread is one of the things I love to do most in the kitchen. I think it is the kneading of dough my hand, feeling the texture change with each fold and the elasticity of the dough as the gluten relaxes, stretches, and become smooth.
I find each stage of the process exciting and rewarding because you can see how the dough is transforming and acting; The first proof (the stage immediately after kneading and setting aside the dough to rest and rise) is often a good indication of the volume of what the finished product might yield. The fun part is the shaping. This is where you get to ‘play’ with the dough by stretching, cutting, or shaping it in the manner you like. It looks small as you rest it on or in a pan but then, by an hour later (or more depending on your recipe and temperature), with the final proof, the dough more than doubles, rising to fill and crown the pan or to spread depending on your shaping and preference. Then comes the time to let go; let the oven do the rest of the work. You will be rewarded with homely, nostalgic aromas along with visions of sweet creamy butter melting on warm soft slices. Hungry yet?
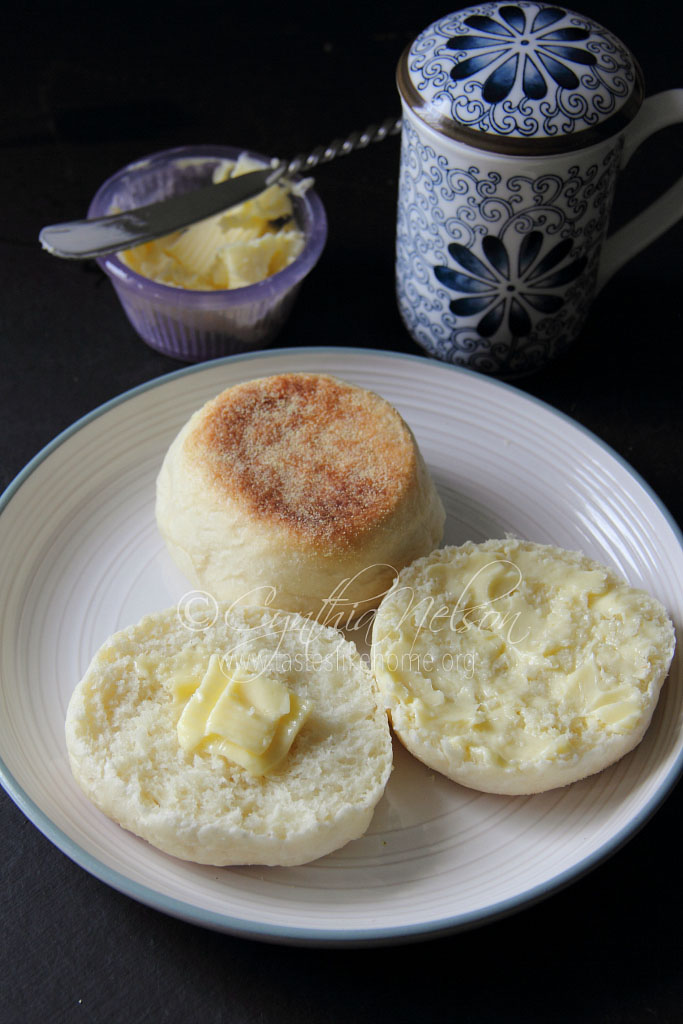
English muffins have been on my bread list of things to make for a while now, and after making them for the first time a couple of weeks ago, I can’t help but ask myself what took me so long. They require no more work than regular bread and are cooked on the stovetop in less time than it takes to preheat the oven. Yeah, seriously.
Using a recipe from a trusted source that I tweaked slightly, these muffins are winners; they are tender but hearty, and very satisfying. You’ve got to give them a try.
A couple things you will need:
● A sheet pan lined with parchment paper
● Heavy-bottomed pan such as cast iron or a gridle
● A tawah can be used in place of a gridle or cast-iron pan
Homemade English Muffins
(Adapted from The Bread Baker’s Apprentice)
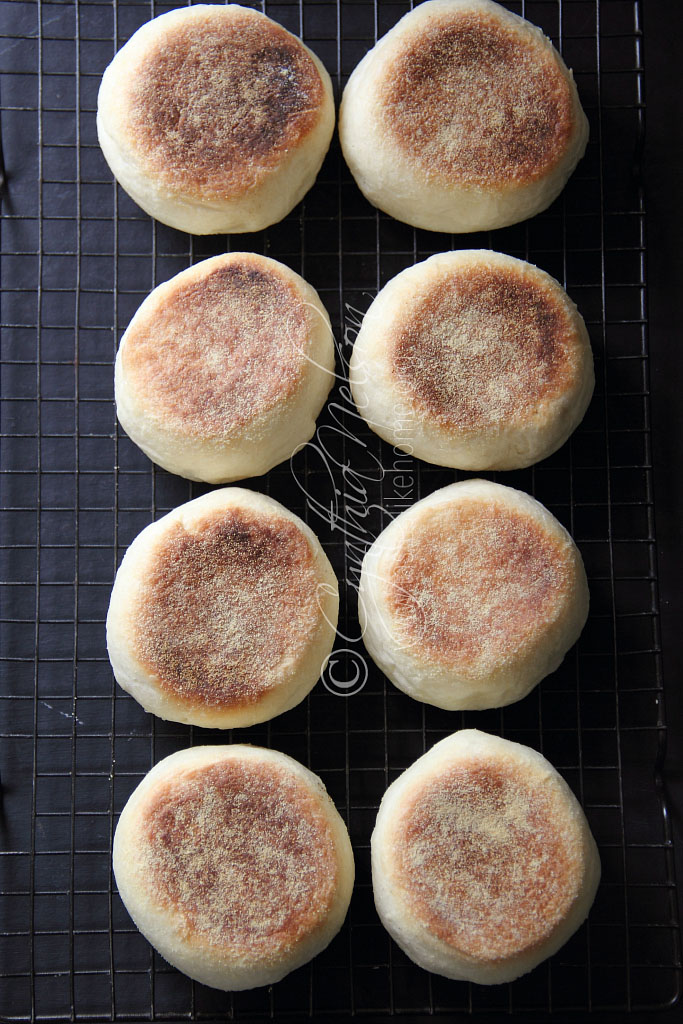
Yield: 8
INGREDIENTS
● 2 ¼ cups all-purpose flour
● ¾ tablespoon white sugar
● ¾ teaspoon fine table salt
● 1 ¼ teaspoons instant yeast
● 1 tablespoon vegetable shortening, room temperature
● ¾ to 1 cup whole milk at room temperature
● Cornmeal for dusting
DIRECTIONS
1. Mix together the flour, sugar, salt, and yeast in a bowl; rub in the shortening.
2. Add ¾ cup of milk to mix the dough and if it is still loose, dribble in more milk until the dough comes together, it should be a soft, pliable dough, not stiff.
3. Knead on a floured work surface for 10 minutes then transfer to an oiled bowl. Rub all over the dough with oil, cover and put somewhere warm but draft free and let proof for 1 ½ hours. The dough should more than double in size.
4. Line a baking sheet with parchment paper and lightly brush the paper with oil then dust with cornmeal.
5. Punch down dough and divide into 8 equal pieces. Shape into tight round balls; lightly brush each ball with oil and set 3 inches apart on prepped baking sheet. Sprinkle the top of each dough ball with cornmeal. Cover loosely with plastic wrap and set aside to rise for 1 hour.
6. Preheat pan/gridle/tawah over medium heat and brush with oil.
7. Using a flat spatula, slide it under the muffins and transfer to pan, placing them an inch apart (depending on the size of your pan, you will only be able to cook 3 or 4 at a time). Cover the remaining dough.
8. Drop the heat to low and cook for 6 – 8 minutes on each side. The dough being cooked will flatten in the pan and spread slightly. The bottoms when turned should be a rich golden brown. Do not turn the muffins before the time as this can cause them to deflate. When turning them over, do so gently. The cooked muffins should sound hollow when tapped.
9. Transfer the cooked muffins to a wire rack to cool. Continue cooking the other muffins.
10. Let muffins cool for at least 30 minutes before slicing and serving.
NOTE
● If you can’t be bothered to make the muffins, shape the dough into a loaf. Brush a 9 x 5 baking pan with oil and dust all over – bottom and sides with cornmeal. Transfer dough to pan, brush top with oil and sprinkle with cornmeal, cover loosely and let rest for an hour and bake in 350 degrees F oven for 25 to 30 minutes. Rest baked bread in pan for 5 minutes and then transfer to wire rack to cool. Wait for at least 30 minutes before slicing and serving.
Cynthia
cynthia@tasteslikehome.org