
 There are certain items you see in a supermarket, grocery or specialty store at prices that raise an eyebrow or two. In an age of rising prices, it makes sense to try making some of these things at home and save yourself some money.
Do you like croutons on your salad? Cut bread into cubes and toast in the oven until dry, firm and crisp. Do you prefer to eat granola for the powerhouse of fiber and nutrients it provides? Make your own, control the sugar and put in more or less of the things you prefer. Pepper flakes, breadcrumbs and green seasoning are among the things that can easily be made at home for considerably less than they would cost to buy, and you are bound to have a quantity that will last for a long time. You know what’s easy to make too? Shredded/flaked coconut that you can use for all sorts of things, even to make coconut milk if you like.
The other day I was in the baking aisle of a well-known supermarket chain picking up some baking powder and self-rising flour when I spotted the price of a small packet of dried shredded coconut. I shook my head thinking how bankrupt I’d be if I had to buy this type of coconut given my frequent and varied use of it. Later that same day, I had to stop at a specialty food store and was shocked to see the price for the same item, albeit a different brand. And then I got to thinking, how hard can this be to make – it’s grated/shredded coconut that is dried. The do-it-yourself bug bit; it was time to try making dried shredded/flaked coconut, also sometimes labelled as desiccated coconut.
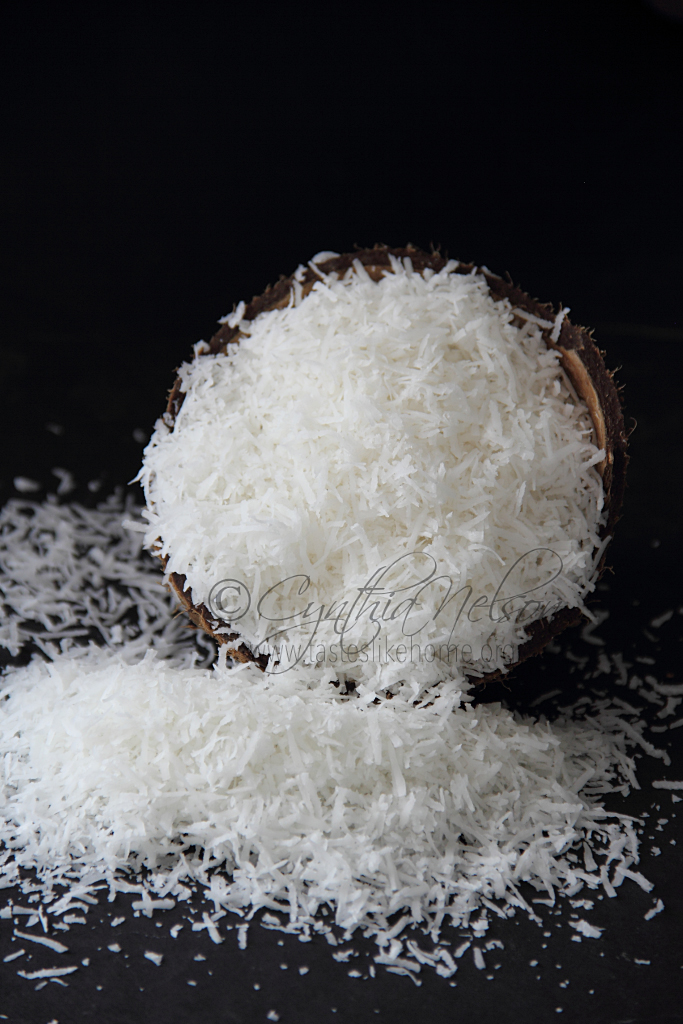
Shredded/flaked coconut is the dried/dehydrated coconut kernel/pulp or what some might call the meat or flesh of the coconut. There are some international markets that make a distinction by labelling it as desiccated coconut because the size/look of the finished product is finer, but not as fine as coconut flour; think of it as chipped very small, hence flakes. Shredded coconut retains all its fat content and most of its fibre, I say most and not all because the brown skin that is removed to give an all-white finish to the product, strips it of some of its fibre content.
Make it
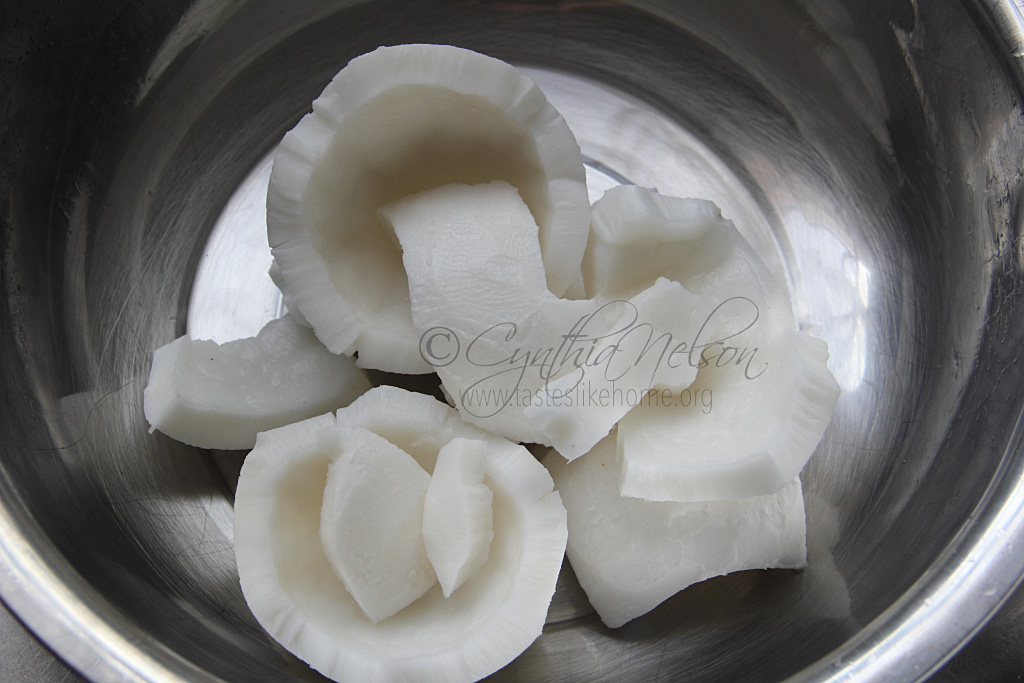
There is no specialty equipment required to make shredded coconut; most people have a box grater and a vegetable/potato peeler around, two tools needed. The most difficult part of the process for those unaccustomed, would be breaking open the coconut and prying the flesh from its hard shell. Once removed, use a vegetable peeler to easily remove the brown skin from the flesh, rinse the coconut well and grate on the smaller of the shred side of a box grater.
After the coconut is grated, as we would say, spread it out in a single layer on a sheet pan and place in a preheated oven at a low temperature – 140 degrees F. The drying time will vary depending on your oven, the volume of coconut and the quality of the coconut – some coconuts are moister than others. At the end of the process, you are looking and feeling for the following: coconut flesh that maintains its white colour but is crisp and dry to the touch. When you pick it up with your hand, you should be able to let it fall back in a shower onto the pan, each shred single and discernable.
Storage
Once completely cooled, store in an airtight container in a cool dry place. Because it is very warm here in the Caribbean, I won’t keep it on the counter at room temperature for more than a week. Remember the coconut though dry retains its oil and can go off and change colour from the heat, therefore, I’d recommend storing it in the refrigerator if you are not planning to use it in a week’s time. In the fridge, it will last up to 6 months; when ready to use, simply bring it up to room temperature by removing the quantity you need and letting it sit on the counter.
However, if your geographic location is a cooler climate, then store the coconut in your pantry or countertop away from direct sunlight and heat.
Uses
Shredded coconut can be used for everything except if making any type of coconut chutney or chutney that requires coconut, or Coconut Choka. If you want to make coconut milk, with the shredded coconut, you can – simply add water and puree in a blender.
Use the shredded coconut just as you would the fresh version for baking – cakes, buns, breads, cookies, muffins and desserts. Sprinkle the coconut over your porridge, cereal, salad, yogurt or add it to your shakes, smoothies and porridge.
To add another level of coconut flavour and texture, toast the shredded coconut.
Fortunately, we live in a part of the world where we have easy and ready access to fresh coconuts, therefore, rare is the occasion that we would seek dried shredded/flaked coconut.
However, if you have the time, and use coconut often for baking or to add more nutrition to your diet, then consider making a batch of some shredded coconut, 2 large coconuts will yield 5 – 6 cups of shredded coconut.
The next time I make it – shredded coconut – I will leave on the brown skin for the added fibre.
Cynthia
cynthia@tasteslikehome.org
www.tasteslikehome.org
Shredded/Flaked Coconut
EQUIPMENT/TOOLS
- Box grater
- Vegetable/potato peeler
- Sheet pan(s)
- Wire rack(s)
INGREDIENTS
Dried coconuts
DIRECTIONS
- Crack and break open coconuts; remove flesh from the shell.
- Peel the brown skin from coconut. Rinse with tap water and drain well.
- Grate/shred on the smaller shred side of the grater.
- Preheat the oven to 140 degrees F.
- Spread coconut in an even layer on a sheet pan and transfer to the oven.
- Heat until dry and crisp to the touch. The time will vary depending on your oven and volume of coconut; it will take anywhere from 1 – 2 hours, however, check every 25 minutes, toss with 2 forks and spread evenly to continue drying. Do not let the coconut brown or develop a colour; if you find this happening, transfer the pan to the middle rack of the oven.
- When dry and crisp to the touch, remove pan from oven and place on a wire rack to cool completely before transferring to an airtight container.
- Store in a cool dry place or in a refrigerator until ready to use.